Chat History
To access the chat history, click on Chat History in the menu under Dashboard. This will navigate you to the chat history page, where all chats are displayed.
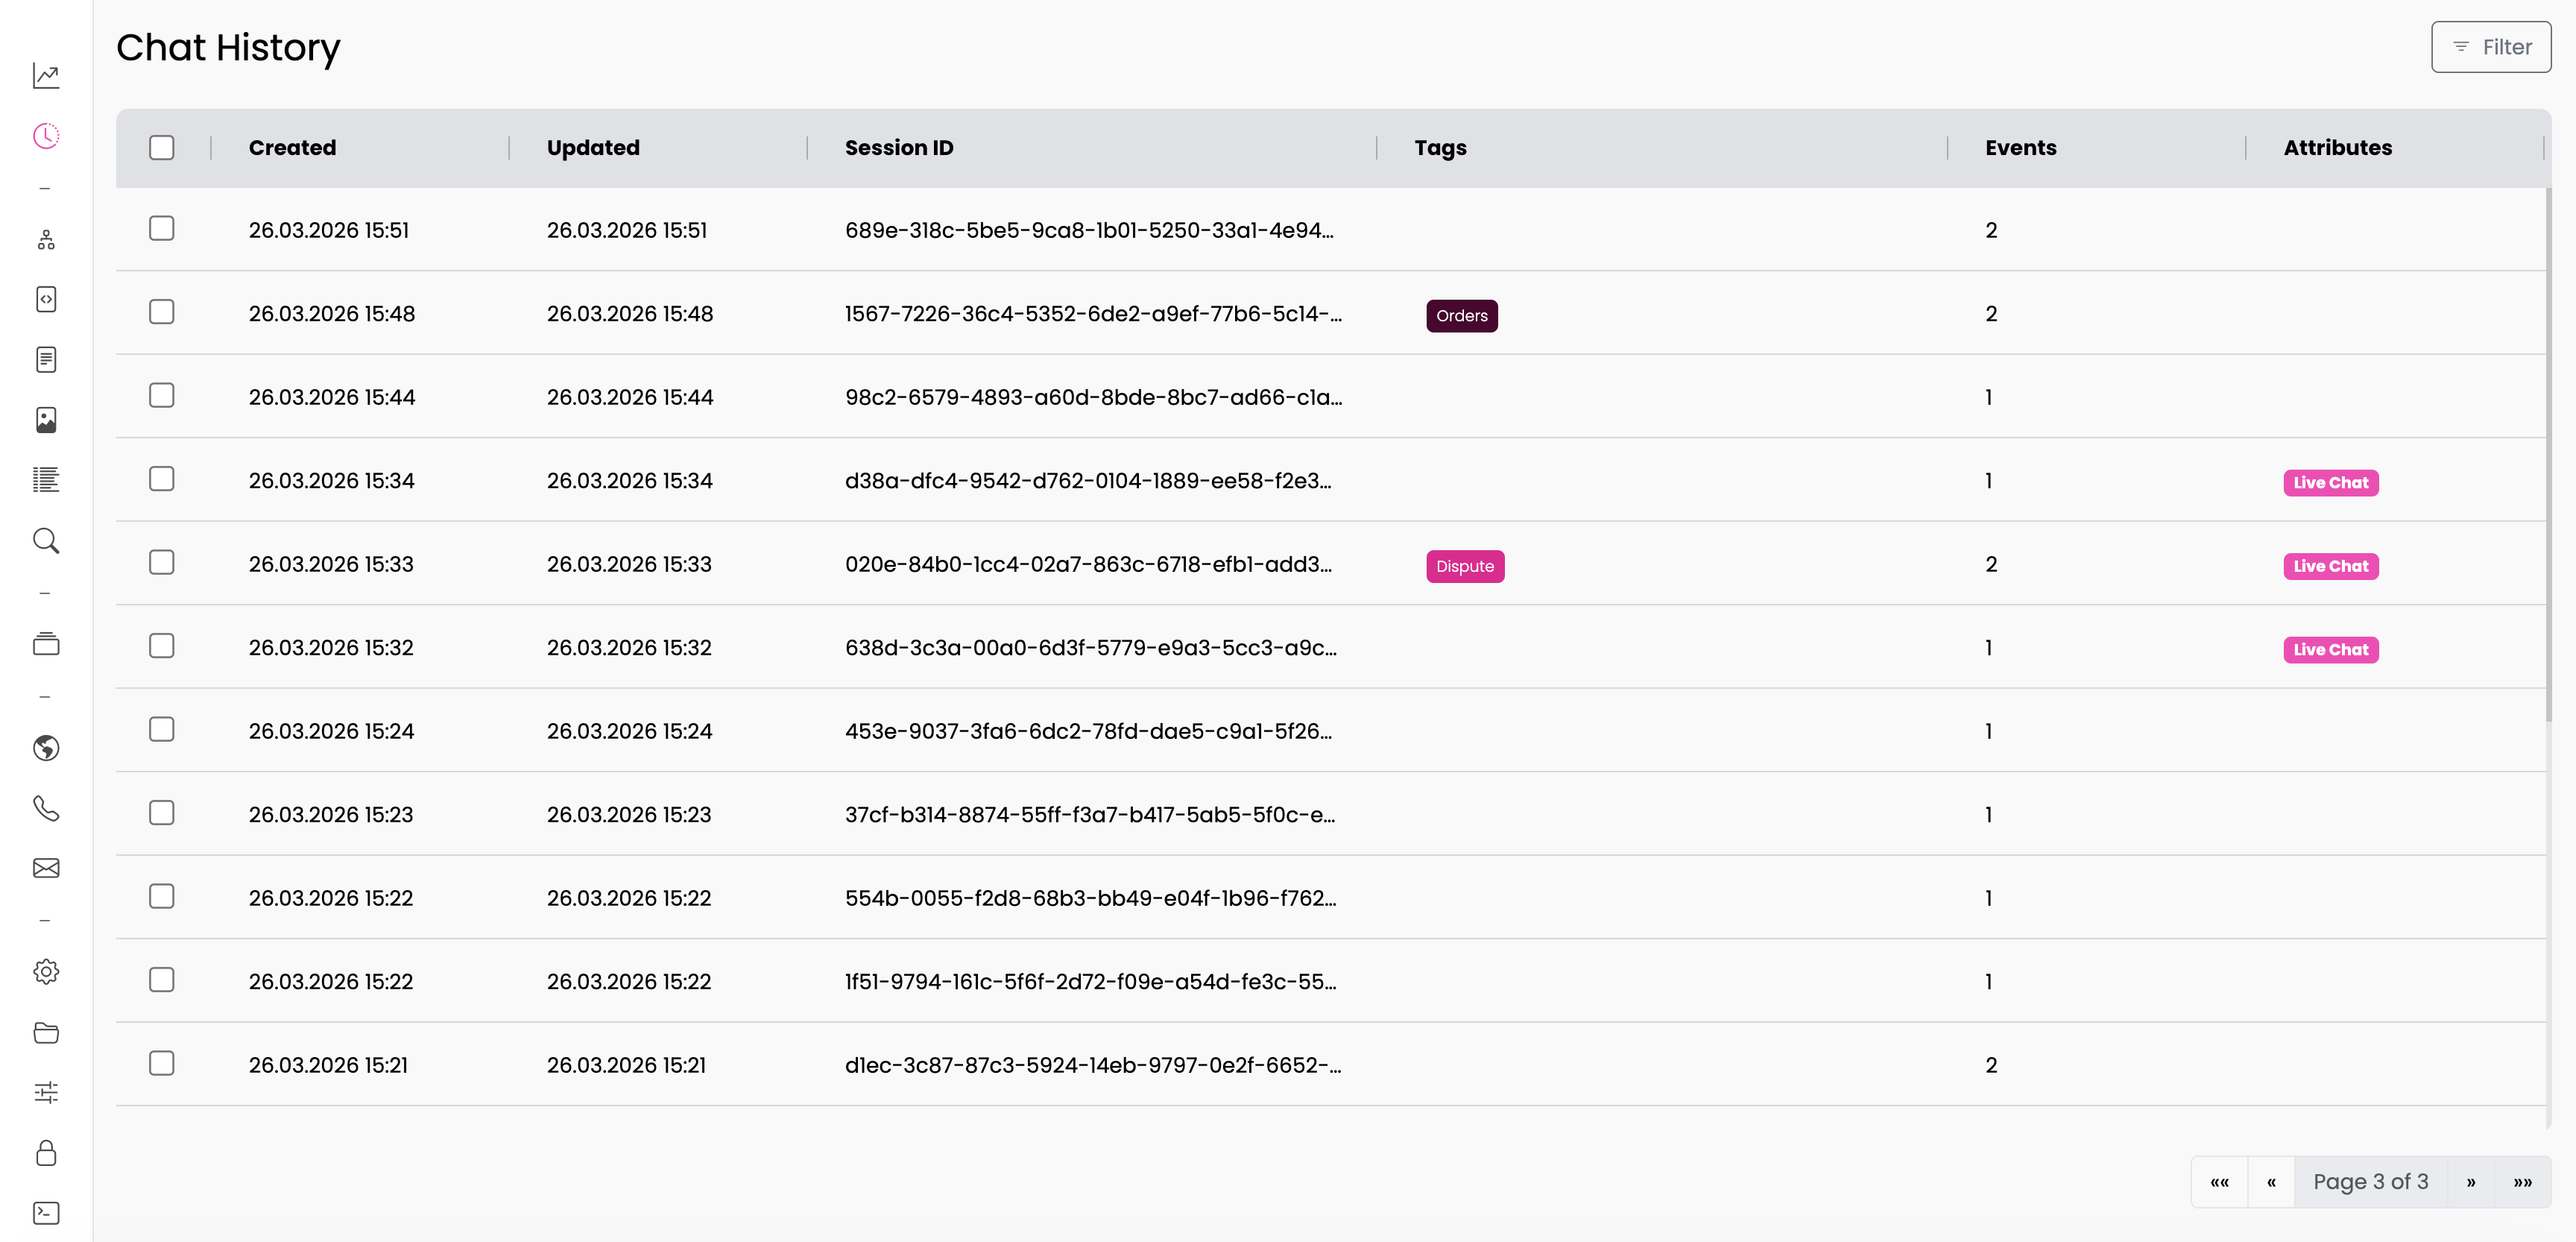
Chat List View
Columns
Each chat entry in the list includes the following attributes:
| Column | Description |
|---|---|
| Created | The timestamp when the chat was created |
| Updated | The timestamp when the chat was last updated |
| Session ID | An anonymous identifier for the chat session |
| Tags | Tags assigned to the chat for categorization and filtering |
| Events | The count of bot messages exchanged during the session |
| Attributes | Displays special attributes of the chat - for example, whether a live chat session occurred |
Filtering
You can filter the chat history by clicking the Filter button in the upper-right corner. A side panel will open with the following filter options:
- Creation Date: Filter chats by creation date using the "From" and "To" date/time pickers.
- Search for attributes: Toggle the desired switches to filter chats based on specific attributes - for example, chats that included a live chat session.
- Tags: Select one or more tags to filter chats by their assigned tags.
- Session ID: Search for a specific chat by entering its session ID.
After setting your filters, click Apply Filter to apply them. Active filters are displayed as badges below the header. Click the X on any filter badge to remove it, or click Reset Filter to clear all filters.
Deleting Chats
To delete chats from the history:
- Select one or more chat entries by clicking on the checkbox next to each entry.
- Click the red Delete button in the upper-right corner. This button will display the number of selected entries.
- Confirm the deletion by clicking Ok, or cancel the operation by clicking Cancel.
Note:
- If you delete chat entries manually, they will not be reflected in the Analytics Dashboard.
- Chat entries are automatically deleted after a set period for privacy reasons (default is 30 days). This period can be adjusted upon request.
Pagination
Use the navigation buttons in the lower-right corner to move between pages of results.
Chat Details View
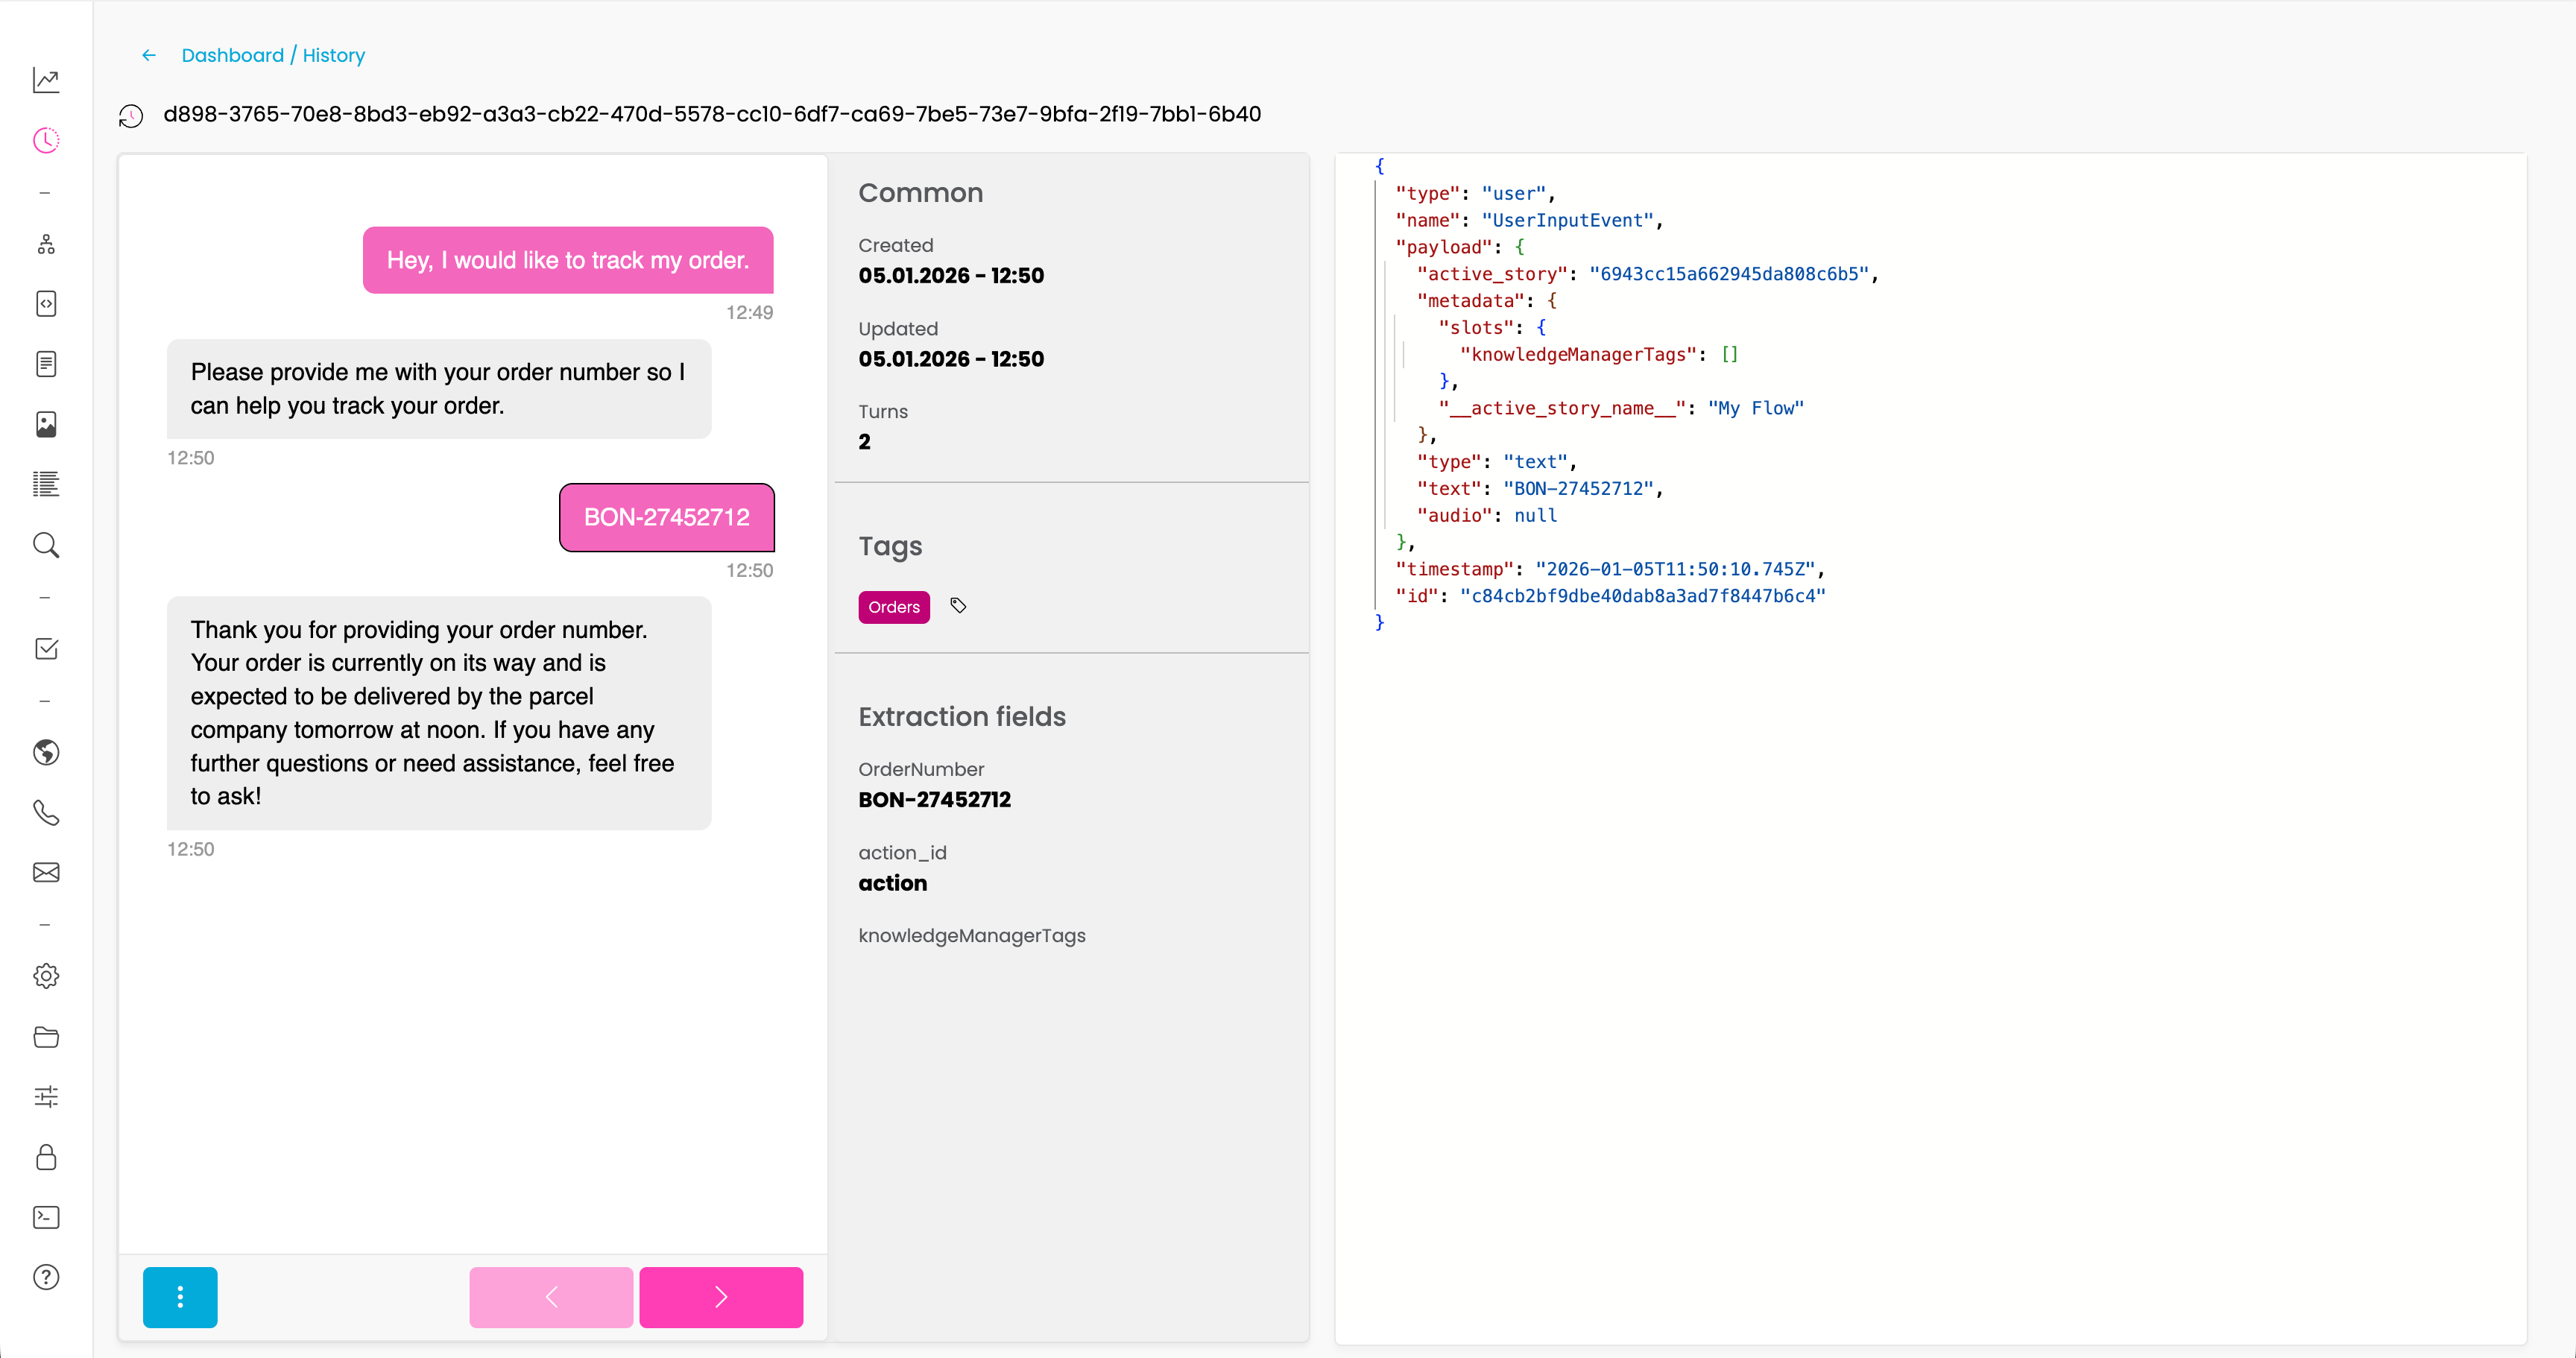
To view additional information about a chat, click on the chat entry in the history list. The following information will be displayed:
General Information
- Session ID: The unique identifier for the chat session
- Created At: When the chat was created
- Updated At: When the chat was last modified
- Turns: The number of bot responses in the conversation
Tags
In the detail view, you can manually add or remove tags from a chat. Tags help categorize conversations for easier filtering and analysis.
To add a tag:
- Click on the tag input field in the Tags section
- Select an existing tag or type a new tag name
- The tag is automatically saved to the chat
To remove a tag:
- Click the X next to the tag you want to remove
Tip: Tags can also be added programmatically during a conversation using the Tracker API. See the Tags section below for more details.
Chat Messages
The main area displays the messages exchanged during the chat. You can:
- Show System Events: Toggle this option from the menu (three dots button) to display background system processes associated with each action in the chat.
- Show Live Chat Events: Toggle this option to display events from any live chat sessions that occurred during the conversation.
Message Details
Click on any message to view its underlying code or technical details in the panel on the right. This shows the raw JSON data for the selected message.
Extraction Fields
If the conversation captured any extraction fields (slots), they will be displayed in the details panel. This includes any information the bot extracted from the user during the conversation.
Navigation
- Use the Previous and Next buttons in the lower-right corner to navigate between chats.
- To delete the current chat, select Delete from the menu (three dots button).
- To return to the main history list, click on the Dashboard / History breadcrumb link in the upper-left corner.
Tags
Tags are used to categorize chat conversations for easier filtering, analysis, and reporting. There are two ways to add tags to a chat:
Manual Tagging
As described above, you can manually add or remove tags when viewing a chat's details. This is useful for:
- Categorizing conversations after review
- Adding quality assurance labels
- Marking conversations for follow-up
Programmatic Tagging via Tracker API
You can automatically tag conversations during the chat flow using the Tracker API in an Action Node. This is useful for:
- Automatically categorizing conversations based on their content
- Flagging escalations or complaints
- Tracking specific conversation outcomes
Example usage in an Action Node:
# Add a single tag
tracker_api.add_tag("complaint")

# Add multiple tags
tracker_api.add_tag("escalation")
tracker_api.add_tag("billing-issue")
Tags added via the Tracker API will appear in the chat history and can be used for filtering. If a tag doesn't exist yet, it will be created automatically.
Note: Tags must be created in the system before they can be filtered on. Tags created via
add_tag()are created automatically if they don't exist.
For more information about Action Nodes and the Tracker API, see the Flows documentation.