Flow
A Flow is a structured sequence of interactions and logic that guides how the bot processes user inputs and responds throughout a conversation.
Create a Flow
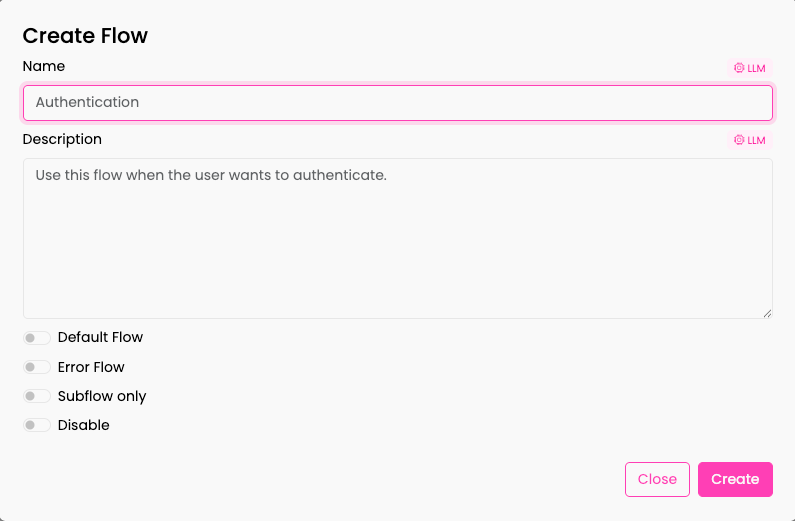
To create a new flow, follow these steps:
- In the upper-right corner, click the Create button to start a new flow.
- Choose a short and descriptive name for the flow.
- Provide a description of the conditions or triggers that should lead users into the flow. This description, together with the name, is used by the orchestrator to map user inputs to the appropriate flows.
- Decide how the flow should operate:
- Default Flow: The flow that the orchestrator automatically enters when no specific flow is identified. There can only be one Default Flow in the system.
- Error Flow: The flow that is automatically used when an error occurs in the bot. There can only be one Error Flow in the system. More information can be found in the Error Flow section.
- Subflow only: This flow is excluded from the orchestrator’s selection process. It must be triggered manually via the API or through a flow transition node. For example, an authorization process would typically be a subflow.
- Disable: The flow is disabled and cannot be invoked either by the orchestrator or manually.
Note: The pink-highlighted LLM label indicates that the entered information is passed to the underlying LLM and processed by it, thereby directly influencing the behavior of the bot.
Edit Flow Settings
To edit a flow, follow these steps:
-
Navigate to the main page where all flows are listed.
-
Find the specific flow you wish to edit in the list.
-
Click the Edit icon in the Action column of the row for the selected flow.

-
Here you can edit the selected flow:
- Edit Name: Update the flow’s name.
- Edit Description: Revise the description to better capture the flow’s purpose.
-
Default Flow/Subflow Settings: Change the configuration as needed.
-
Additional Actions:
- Delete Flow: Remove the flow if it is no longer required.
- Cancel: Press to close the window and keep previous settings.
- Copy Flow Identifier: Copy the flow’s unique identifier for reference.
-
Save Changes: Click the button to apply all modifications.
Designing interactions
Interactions within a flow are designed using Nodes. Each node represents a specific action or decision the bot will make during the conversation.
How to Add a Node
-
Access Flow Information: Open a created flow and click on the head node.
-
Select Node Type: You can add various types of nodes based on the desired functionality for the bot.
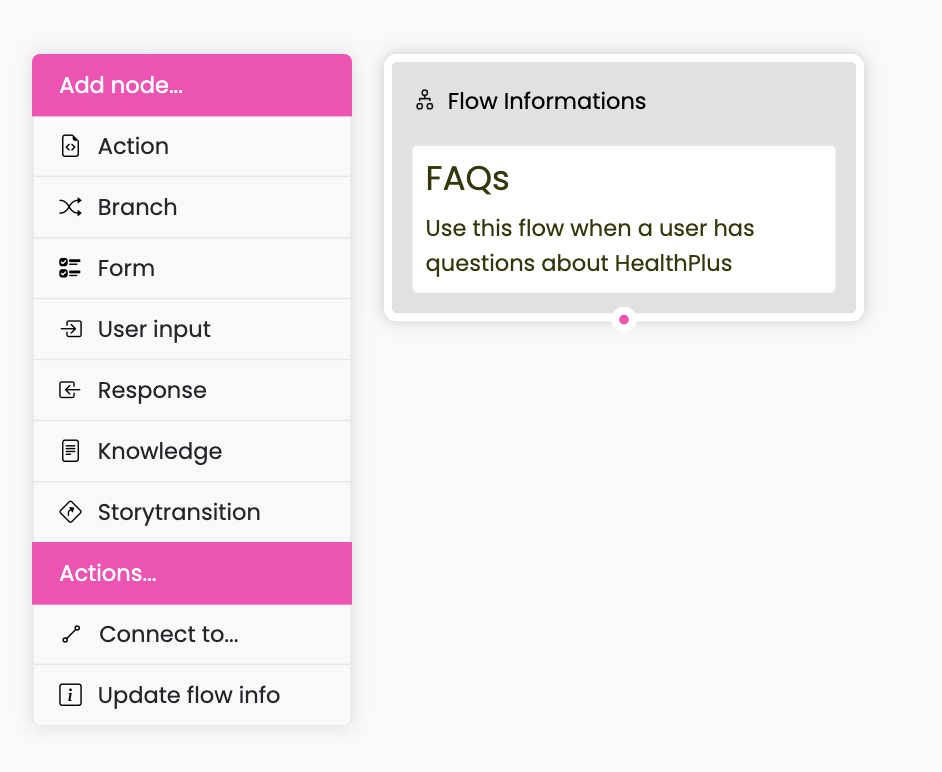
Types of Nodes
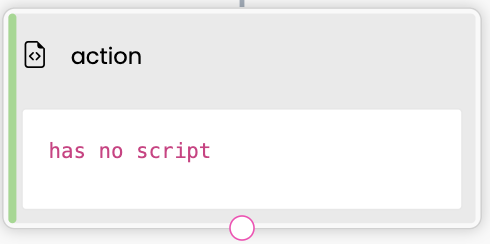
Action Node
An Action node allows you to define specific tasks for the bot by integrating Python code. This includes invoking methods from your scripts to enable the bot to perform functions such as querying databases or executing external operations.
Branch Node (If/Else)
A Branch node allows you to define conditional logic. You can create if...else branches to control the bot's behaviour based on a certain rule. Depending on this rule, you can configure the bot's next response by adding a new nod to a corresponding branch.
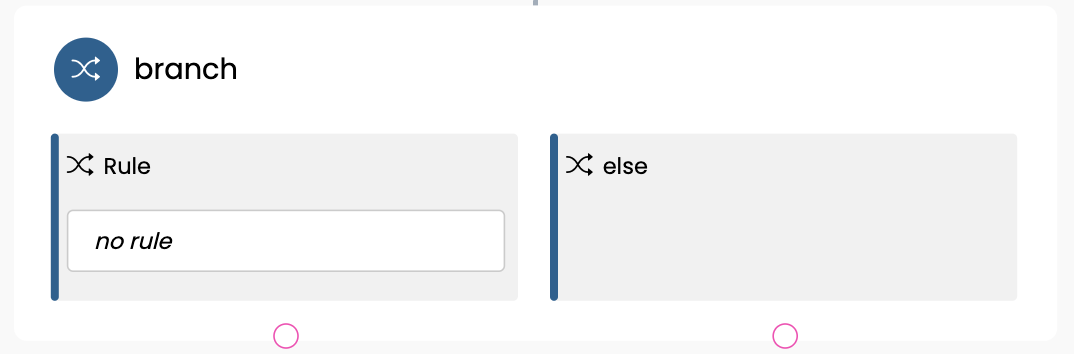
Adding conditions to a branch node:
-
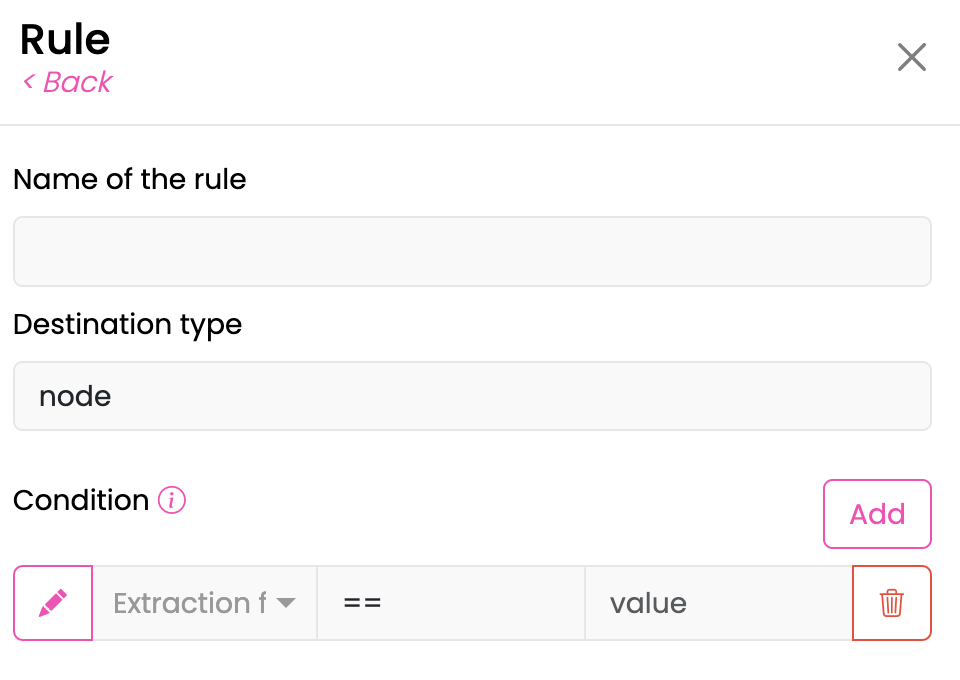
Create a Rule: After adding a branch node, click on the Rule section, click not set to edit a rule. You can also create multiple rules by selecting Add.
-
Name a Rule: Give your rule a descriptive name to help identify it later.
-
Define a Condition: Click "Add" next to the Condition field. Here, you can describe the condition that must be met for the bot to follow a certain branch. To do this, select or create an extraction field (see the instruction on how to create an extraction field below), select a logic operator (e.g., equals, greater than) and enter the corresponding value. Additionally, you can create multiple conditions.
Note: Multiple conditions are AND connected.
Form
You can streamline information gathering from conversations by utilizing Forms. A Form allows the bot to capture specific details from the user, such as date and time for booking an appointment.
To set up a Form:
-
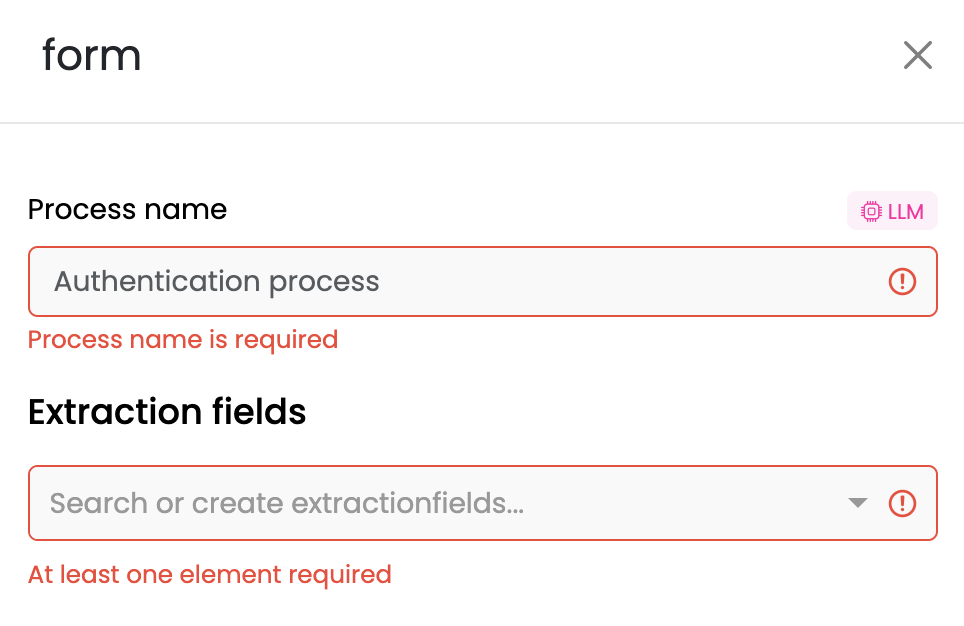
Name a Process: Give your Form a descriptive name based on its purpose. For example, if you're setting up an appointment process, name it "Book Appointment."
-
Create or Select Extraction fields: Identify the key pieces of information you want to extract. For instance, for an appointment, the required fields might include "Date" and "Time." The bot will automatically prompt the user to provide these details during the conversation and store them for future use. (See how to create an extraction field instruction below).
Interaction example: When the user initiates an action (e.g., booking an appointment), the bot will ask for the specified details, such as the desired date and time. It will then save this information once provided.
-
Optional Advanced Settings:
- Detailed Process Description: Provide a more in-depth description of the process.
- Agent: When working with forms and extracting data from the chat, you can select an Agent to handle the process. Agents serve as a bridge between the conversation history, the provided slots and the task completion. Different predefined Agents are available which serve different tasks. The specific function of each agent can be seen by their name and their description in the documentation. The default Agent represents an intelligent Formular which tries to extract all the slots defined in it. It automatically asks the user for the missing slot values and verifies the given information based on the slot description and in the end through the validation scripts of each slot. To summarize, the default agent gathers information and provides a text response every time. Other predefined agents only function as extractor and don't ask for missing slot values automatically. If the predefined agents are not fitting for your specific task, you can define a custom Agent within the script area under the section "agents".

- LLM Settings: See LLM Settings below.
User Input
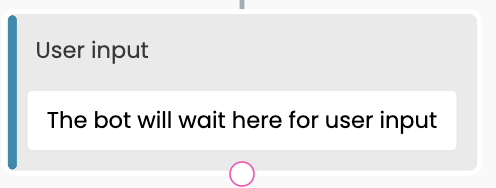
Use this node if you want your bot to pause and wait for the user's input before proceeding to the next step in the conversation flow. This ensures that the bot gathers necessary information or confirmation from the user before moving forward to the next node in the process
Response
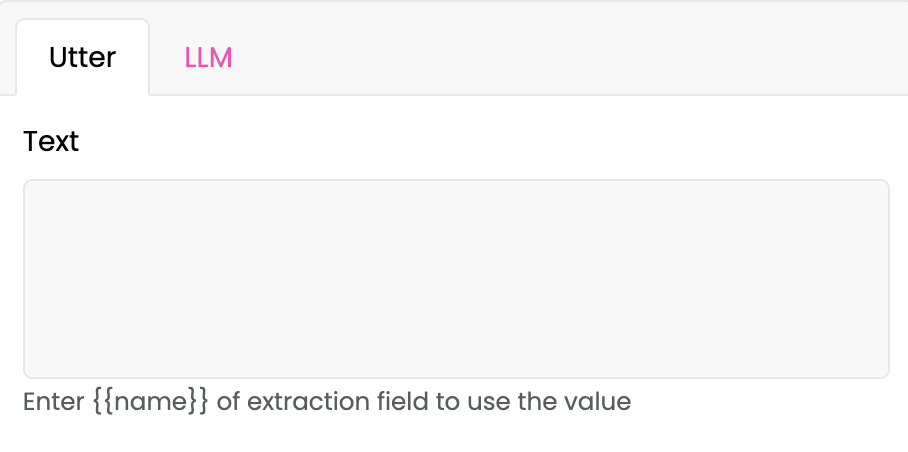
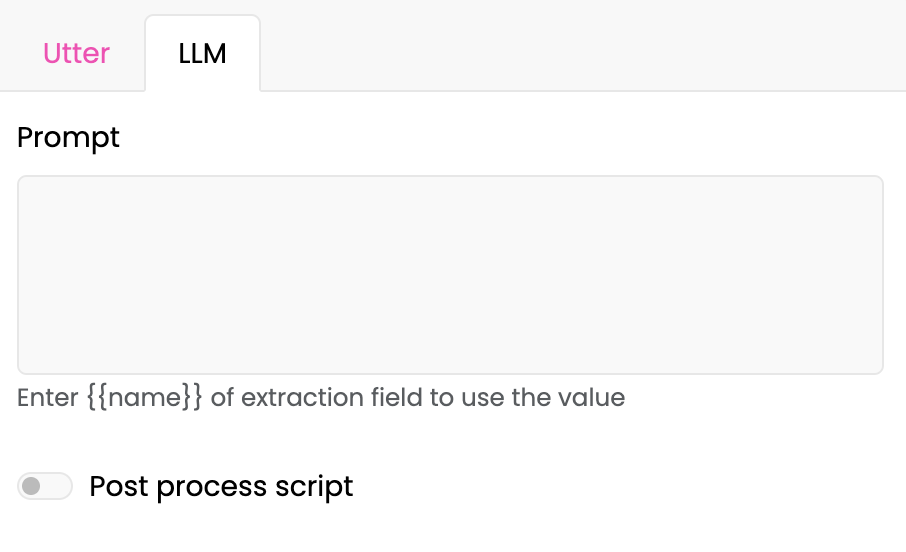
Use this node to make a bot send a message at this point of conversation. There are two types of response:
- Utter: a static predefined response that the bot delivers (e.g., for confirmation purposes or to be in full control of the bot's answer). If you want to reference an extraction field within the message, simply enter
{{name}}of the extraction field to insert its value into the message. For example,{{date}}will display the extracted date in the message.
- LLM: This represents a response generated by the LLM based on your prompt. Enter the information you want the bot to convey to the user in free form. For example, you could type: "Inform the user that their appointment is confirmed for
{{date}}." This prompt guides the LLM in generating a message that incorporates the specified details, such as the appointment date.
- The Process Script is used to filter and modify the output generated by the Language Model (LLM). Its functions may include tasks such as filtering content, altering the format, or applying specific rules to ensure the output meets certain criteria. For detailed information on post-processing modes and scripting, see Post-Processing Scripts.
- You can also configure the LLM Settings for the response. See the instruction LLM Settings below.
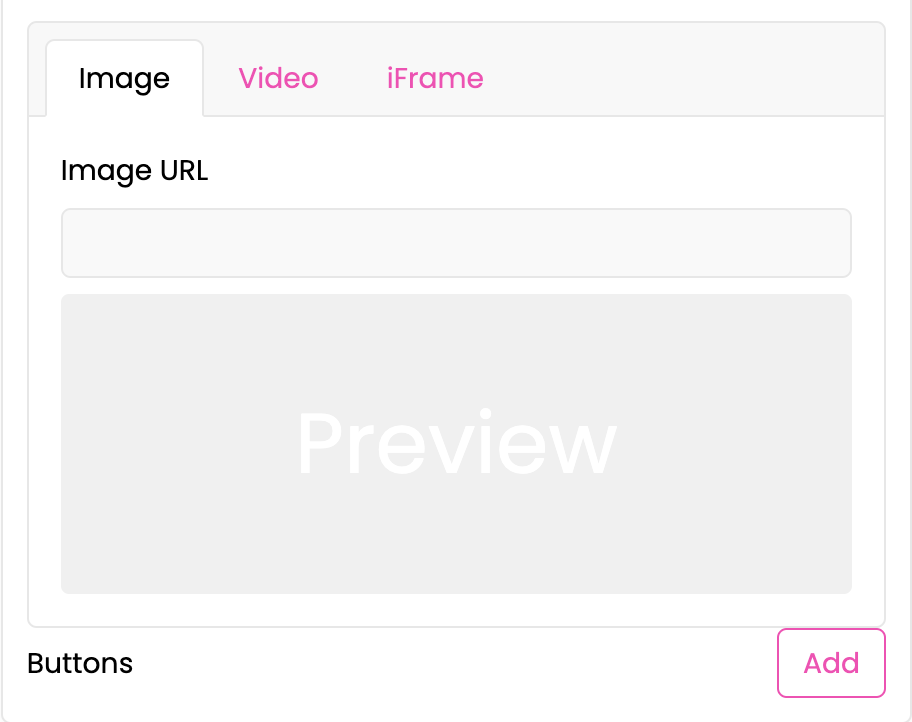
For both types of responses, you can use:
- Image/Video: You can enhance the bot's response by attaching an image or video using a URL. A preview of the attached media will be available for easy viewing.
- Feedback If the statement is true, the user can rate the answer with a “thumbs up” or “thumbs down.” If the rating is negative, the user can add a comment.
Knowledge
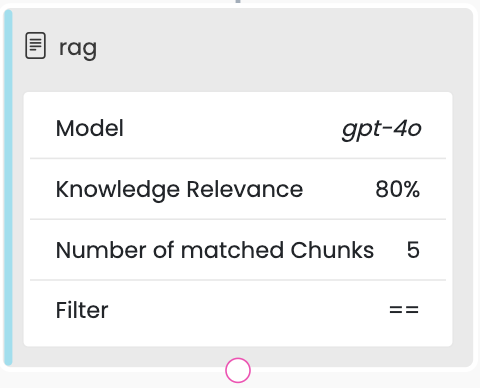
You can use this node when you want the bot to generate responses based on the content you have uploaded into the system.
-
Create a Prompt: Instruct the bot to utilize specific content and documents for generating its responses. You should specify what the bot should say if it cannot find an answer from the available content. Example: "Please use the following context to answer the question. If the question cannot be answered based on the context, please respond with 'I don't know'."
-
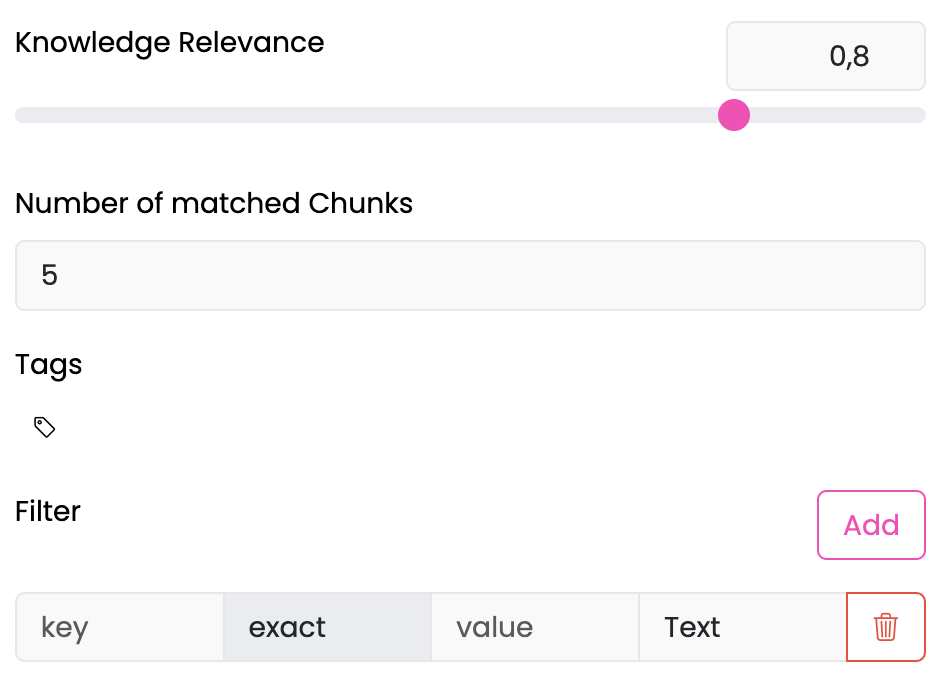
Set Knowledge Relevance Threshold: Adjust the threshold of relevance from 0 to 1, where 1 ensures that only the most relevant content is used. This ensures precise matching to the question being asked.
-
Set Number of Matched Chunks: Specify the number of chunks to match for a response. For instance, selecting 5 chunks will ensure that the bot formulates an answer based on the 5 best-matching pieces of content.
Keep in mind that the number of chunks impacts the amount of information sent to the model, which in turn might affect the cost of processing in case of using external LLM providers.
-
Add Relevant Tags: Use relevant tags assigned to documents to enhance the quality of the answers. Tags can also differentiate between redundant or overlapping information. For example, you might have tags like “Subscription 2023” and “Subscription 2024” to help distinguish between similar content for different client cohorts. These tags ensure that the bot uses the most accurate and contextually appropriate information. To delete a tag, click on the tag icon and then click the "X" next to the tag name.
-
Filter: You can filter the data that the bot uses in its responses based on the metadata of the information chunks. For instance, if you want the bot to use only chunks written in English, you can set a filter according to the metadata associated with each chunk. Here’s how it works:
-
Metadata Key: This is the specific metadata field used to categorize the chunks. For example, if chunks are tagged with a language, the key might be
language. -
Metadata Value: This is the value that the metadata field should have. For example, to filter for English, you would set the value to
EN.
By applying these filters, you ensure that the bot references only the relevant chunks of data in its responses.
-
-
Feedback: If the statement is true, the user can rate the answer with a “thumbs up” or “thumbs down.” If the rating is negative, the user can add a comment.
Flow Transition
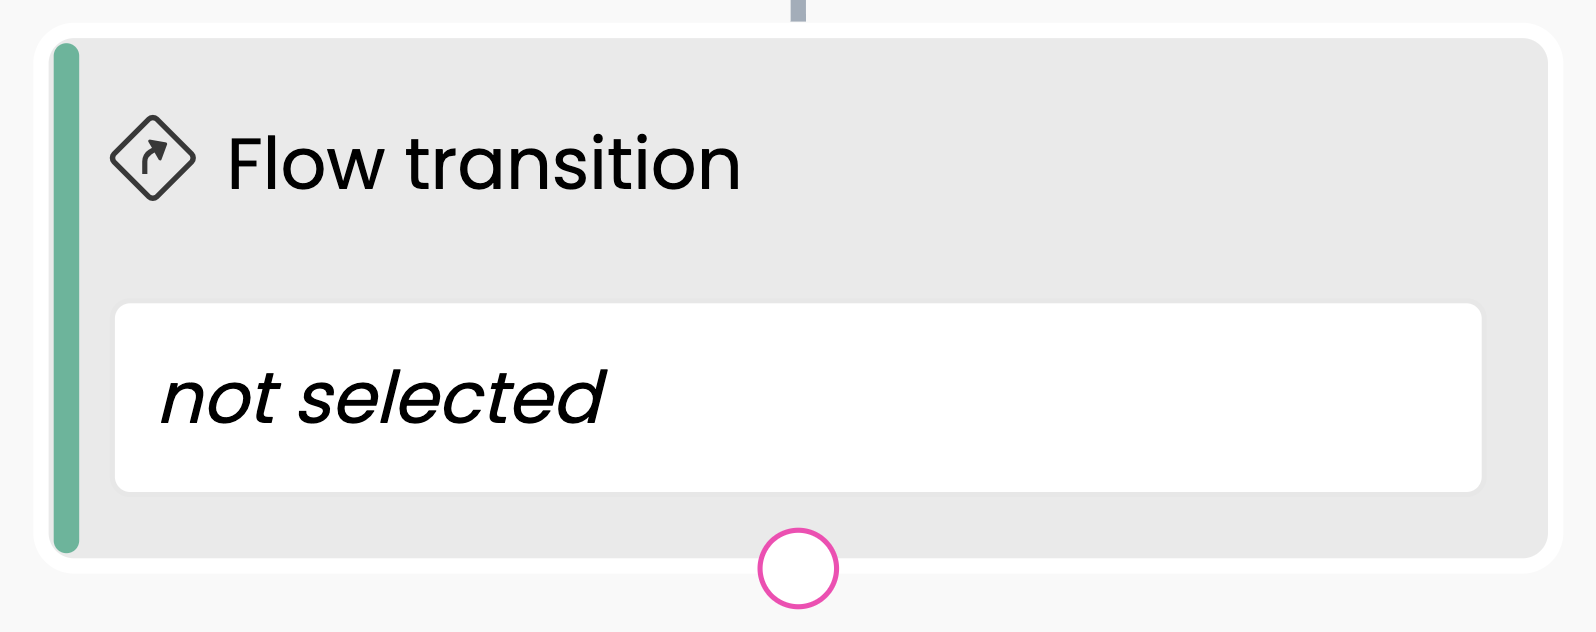
You can redirect the bot to another flow. Add flow transition node. Click not selected, and then choose the target flow to which you want to redirect the current flow at this point.
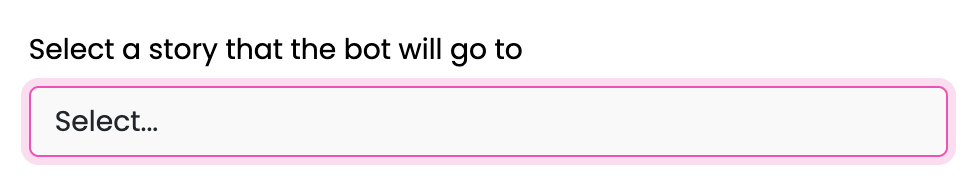
Substories (Nested Flows)
When a flow transition node redirects to another flow, the target flow runs as a substory — a nested flow that executes within the context of the parent flow. Once the substory completes (i.e., reaches a node with no follow-up), the bot automatically returns to the parent flow and continues from the node after the flow transition.
Substories can be nested: a substory can itself contain flow transition nodes that load further substories. When the deepest substory finishes, the bot unwinds back through each level until it reaches a parent that has a next node to continue with.
State isolation modes
Each flow transition node has an Isolated State setting that controls how the substory tracks its progress:
-
Non-isolated (default): The substory gets its own independent state entry. This means it remembers which node it was on, even after returning to the parent. If the user re-enters the same substory later in the conversation, it resumes where it left off instead of restarting. Because the state is shared globally, if two different parent flows both transition into the same substory, they share the same progress — entering from either parent continues where the other left off. This is useful for multi-step processes that the user might leave and come back to, such as a lengthy onboarding wizard or a multi-part form.
-
Isolated: The substory shares the parent flow's internal state entry. When the substory finishes and is re-entered later, it always starts from the beginning. If two different parent flows both transition into the same substory, each starts independently from the beginning. This is the standard behavior for self-contained tasks like collecting a piece of information or running a one-off action.
Note: Isolated and non-isolated substories cannot be mixed within the same chain of nested flow transitions. All substories in a chain must use the same mode.
Forwarding (Phone only)
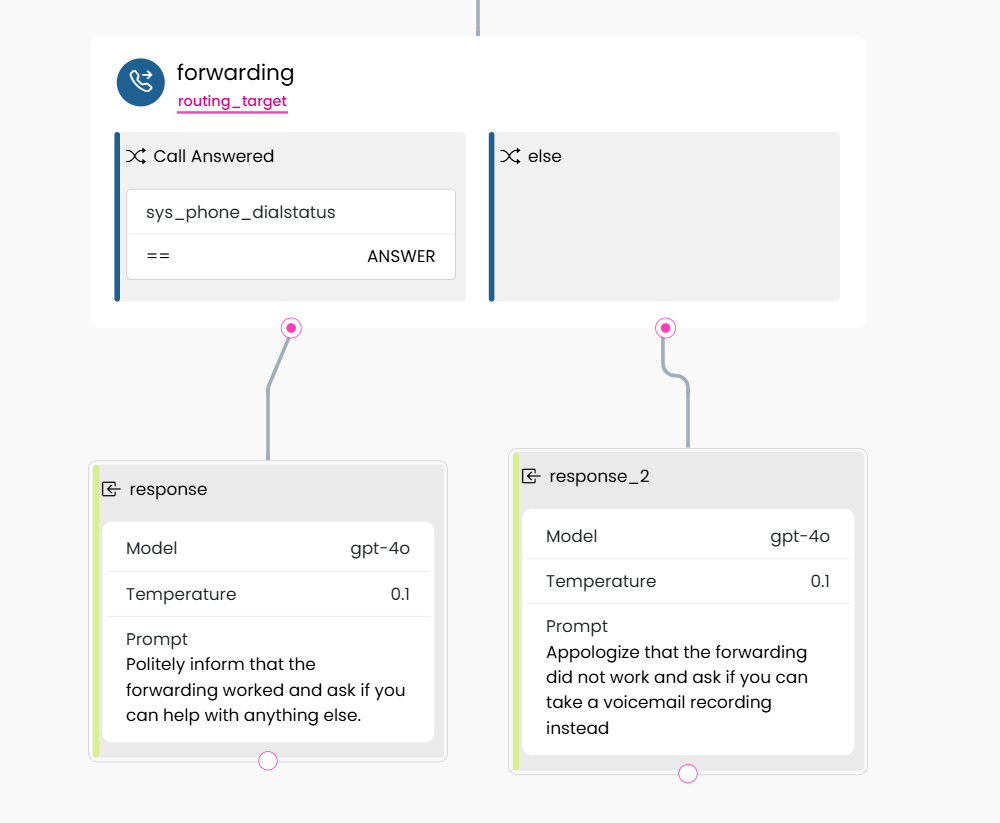
Use this node to forward the current phone call to another number. The bot pauses while the call is in progress and resumes once the forwarded call ends.
Configuration:
| Field | Description |
|---|---|
| Phone Number | The destination number. Supports template syntax (e.g. {{routing_target}}) to use extraction field values. |
| Ringing Duration | How many seconds to ring before the call times out. |
| SIP Headers | Optional custom SIP headers. Each header has a key and a value, which can be either static text or an extraction field. |
How it works:
- The node sends a forward request to the phone server and waits for the call to complete.
- Once the call ends, the result is stored in the
sys_phone_dialstatusextraction field. - The node has multiple outlets (like a Branch node), so you can define conditions on each outlet to handle different dial status results directly.
Dial status values:
| Status | Meaning |
|---|---|
ANSWER | Call was answered |
BUSY | Called party was busy |
NOANSWER | No answer within ringing duration |
CANCEL | Call was cancelled |
CHANUNAVAIL | Endpoint unreachable |
CONGESTION | Network congestion |
Note: The Forwarding node is only available for bots with a Phone channel. For more details on phone-specific APIs, see Phone API Reference.
Livechat
Use this node to hand the conversation over to a live agent. When the bot reaches this node, it pauses the flow and transfers the user to the livechat system.
- Group (optional): Select a competence group to route the conversation to the appropriate team. If no group is specified, the default routing applies. (See Groups for setup instructions.)
After the livechat session ends, the flow continues to the next connected node.
Creating an extraction field
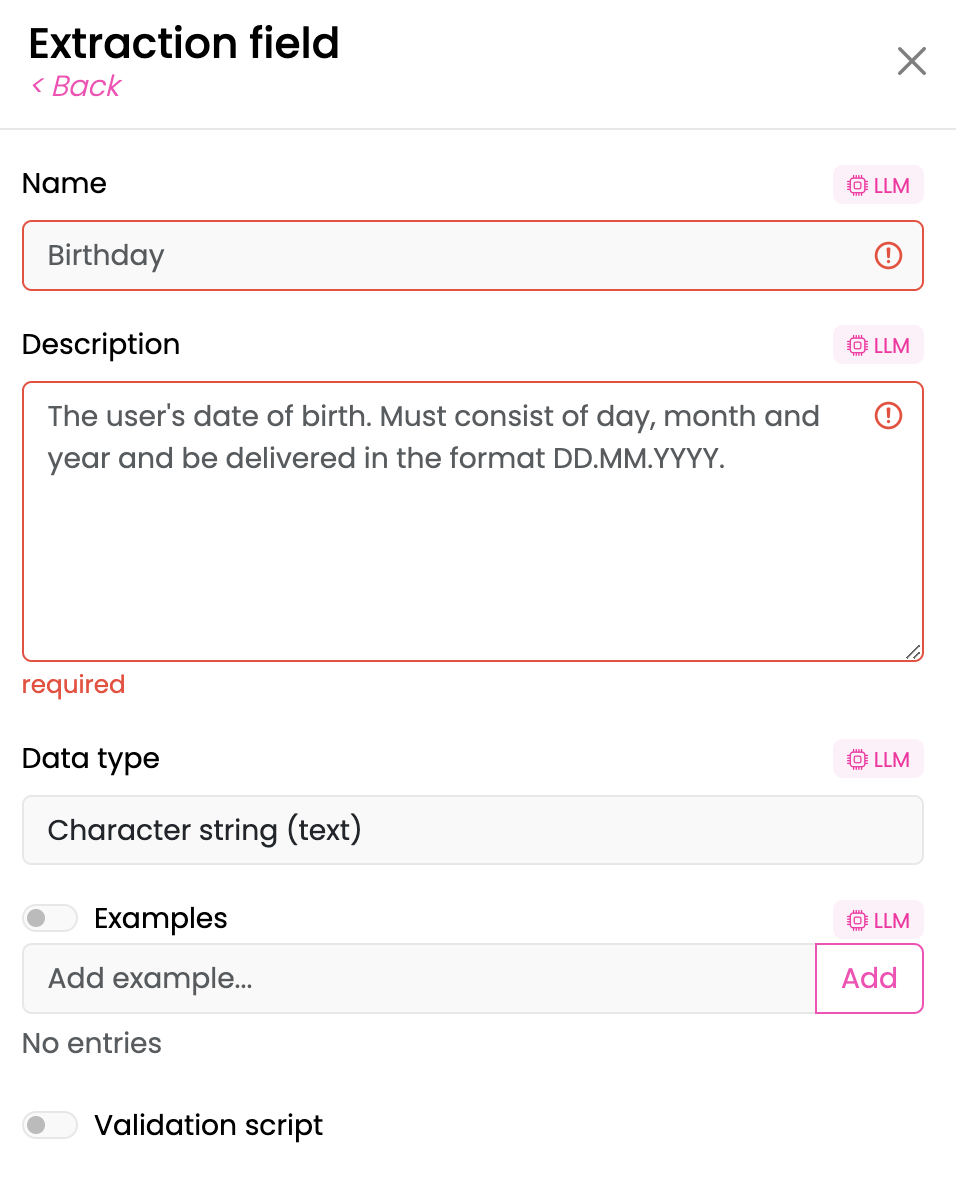
When building a chatbot, you may need to gather specific information from the user and store it for future use, such as personalizing responses or making informed decisions based on the user's input. To do this, you need to create or choose an extraction field. Here's how:
-
Create or Select an Extraction Field: You can either create a new extraction field or choose one from the existing list. An extraction field is a piece of information that the user is required to provide (e.g., name, email, ID number).
-
Naming the Extraction Field: Give the extraction field a clear and descriptive name. The name should be precise because it helps guide the bot in identifying the correct information from the user.
-
Writing the Description:
- In the description field, explain what the bot should be looking for. This description serves as guidance for the bot to identify the correct data from the user's response.
- You can also provide information about the format of the data. For example, if the extraction field is for an ID, you might specify that the ID should include a certain number of digits and letters (e.g., "4 letters and 6 numbers"). If you're asking for a date, specify the format (e.g., "DD.MM.YYYY").
-
Choosing the Data Type: Select the appropriate data type for the information the bot will extract. The data types could be:
- Integer (for whole numbers)
- Float (for numbers with decimal points)
- String (for text-based information like names or addresses)
- Boolean (yes or no)
- Date (for dates with a specific format)
- Date and time (for appointments)
-
Providing Examples: You can also provide examples in the description to help the bot better understand what kind of data to expect. For instance, for a phone number extraction field, you might include: "Example: 555-1234". This helps the bot learn how to correctly recognize and handle the data.
-
Providing Categories:
- Categories serve as predefined examples for specific types of information. For example, users may describe their subscription plan in various ways, but by defining these plans, the bot can more effectively interpret and classify the information, regardless of how it's worded.
- To add a Category, switch the toggle next to Examples to enable category input.
- Attaching Validation script: You can also attach a validation script that can be used for various purposes, such as validating input or performing calculations. To add a validation script, switch the toggle and add python code.
LLM Settings
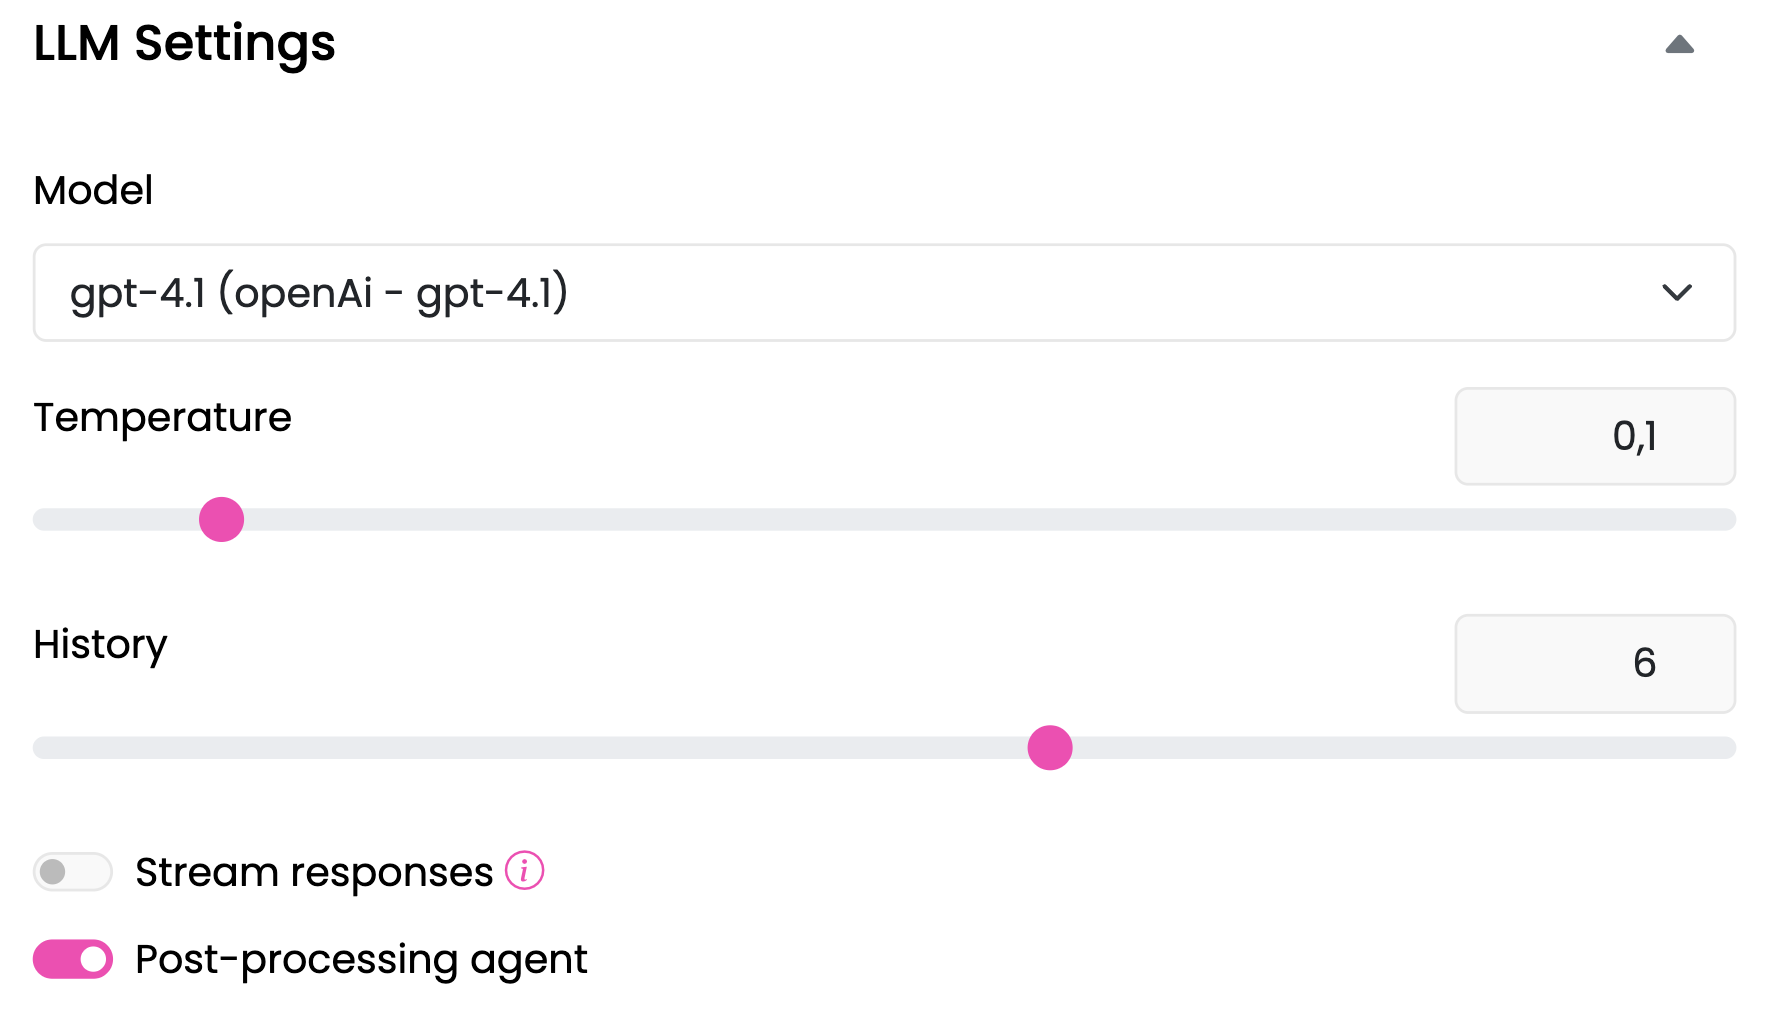
- Model: If you have multiple LLM models, you can select and adjust which model the bot should use for each specific response.
- Temperature Adjustment: Modify the bot’s response creativity by adjusting the temperature setting (higher for more creative responses, lower for more focused responses).
- History Settings: Control how much of the conversation history the bot retains to influence its responses.
- Stream responses: When activated, the bot doesn’t wait until it has generated the entire response. Instead, it provides the answer step-by-step as it is being generated.
Other Actions with Nodes
Connect different nodes: Click on the node, choose Connect to... under Actions..., choose a node it needs to be connected to. Delete node: Click on the node you want to delete, choose Delete node under Actions...
Tips
When creating a chatbot that interacts with users, there are often topics or subjects that you might want to handle carefully or avoid altogether. This is where "blacklist topics" come into play. You can create specific flows for these topics to ensure the bot provides appropriate and safe answers.