Scripts
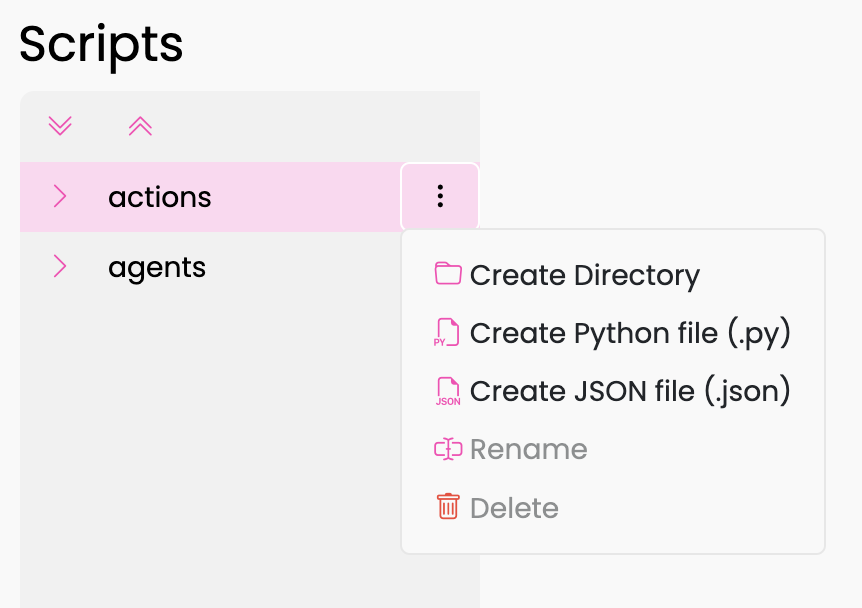
The Scripts section allows users to manage and organize script files. The following actions can be performed by interacting with the three-dot menu:
- Create Directory: Allows users to create a new folder to organize scripts.
- Create Python File: Enables users to create and add a new Python script file.
- Create JSON File: Allows users to create a new JSON file.
- Rename: Renames any selected file or directory.
- Delete: Deletes the selected file or directory.
- Take Over Script: Transfers ownership of the script from the current user to another user.
Note:
- Draft files (files that are not finalized or published) will be ignored during the deployment process.
- The agents directory serves as the root directory for all custom agent scripts. All custom agent files and directories are stored here, providing a structured environment for managing agent-related scripts.
Agent Types
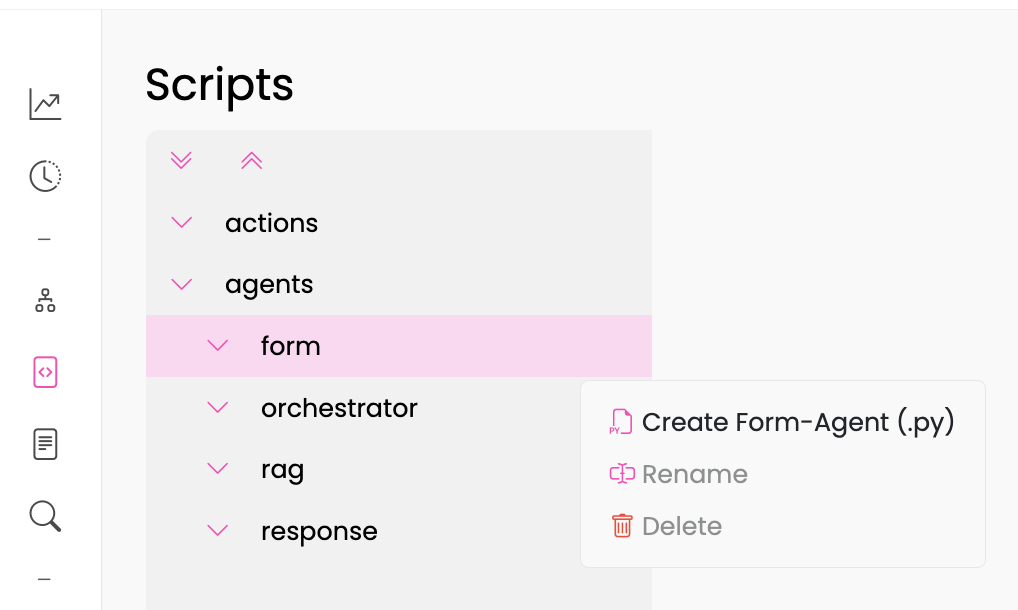
Under the Scripts section, you can create custom agents tailored to fit specific needs across four distinct categories: Form, Orchestrator, RAG (Retrieval-Augmented Generation), and Response. These agents can be assigned to various node types within your workflow, allowing you to customise and enhance functionality based on your requirements.
If the predefined agents in the Flows section do not align with your task, use this feature to define a custom agent and integrate it seamlessly into your flow.
Drafts
Creating a Draft
- Create a New Script File:
- Select Create Python/JSON File. This action automatically creates a draft.
- Drafts are identifiable by a draft tag next to the file name.
- Drafts will be ignored by the system until they are deployed. To deploy a draft press Deploy draft in the upper-right corner.
- Ownership:
- Scripts and drafts are locked when another user is working on them to prevent conflicts or overwrites
- To see who owns the script, hover over the lock icon next to the draft tag.
- If you need to edit a draft that belongs to another user, click on the three dots menu next to the file name and select "Take Over".
Saving Changes
Once you have completed your work on the script, or if you need to close the window, ensure that you save your draft:
- Click "Save" in the upper-right corner.
Full-Screen Mode
For an enhanced coding experience, you can expand the code field:
- Click the Zoom-Out Icon in the upper-right corner to enter full-screen mode. To exit full-screen mode, simply press ESC.
Version Management
Drafts support version management, allowing you to track changes effectively. To view previous versions, select Draft to original from the three-dots menu or Show versions when you want to see the versions of the script that is not a draft:
- Changes made in the draft
- The date of the changes
- Users who made those changes
In this menu, you also have the options to delete or deploy the draft.
Cron Scripts
Cron Scripts allow you to schedule Python scripts to run automatically at specific intervals, e.g. daily, weekly, or monthly. These scripts execute independently of user conversations and are ideal for automated tasks such as:
- Scraping websites or other resources to update the knowledge base
- Scheduled API calls to external systems
- Any recurring task that doesn't require user interaction
Creating a Cron Script
To create a cron script, follow these steps:
- The Scripts section has a subsection called Cron.
- Here you can create a new Python file (click the three dots next to Cron, then select Create Python File).
- Give your script a descriptive name (e.g.,
daily_report.py). - Use the following template structure:
from shared import PeriodicScriptTrackerApi
from shared import CronScript
from loguru import logger

class cron_script(CronScript):
    async def run(self, tracker_api: PeriodicScriptTrackerApi):
        # Start coding here
Note:
- The class must be named
cron_scriptand inherit fromCronScript.- The
runmethod must be defined asasync def run(self, tracker_api: PeriodicScriptTrackerApi).- All script logic must be placed inside the
runmethod!
Cron Script Toolbar
Once you have opened a cron script in the editor, you'll see a toolbar with several icons for managing your script:
- Execution History Icon (first icon): View the execution history of the cron script, including status, start time, duration, and logs for each execution.
- Manual Execution Icon (second icon): Manually execute the script immediately for debugging and testing purposes.
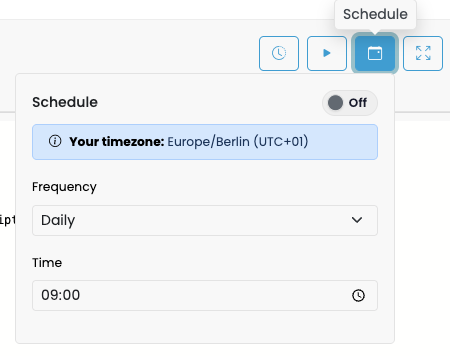
- Schedule Configuration Icon (third icon): Enable and configure cron execution schedules (daily, weekly, or monthly).
Configuring the Schedule
Once you have created your cron script, you can configure when it should run:
- Click on your script file in the file tree to open it.
- Save the script first (it must not be a draft to be scheduled).
- Deploy the script by clicking Deploy draft in the upper-right corner.
- Click the schedule configuration icon (third icon) in the toolbar to open the schedule configuration dropdown.
- In the scheduling menu:
- Toggle "Cron Enabled" to ON to activate scheduling.
- Select the frequency:
- Daily: Runs once per day at the specified time.
- Weekly: Runs once per week on a specific day.
- Monthly: Runs once per month on a specific day.
- Choose the time when the script should execute (displayed in your local timezone).
- If Weekly is selected: choose the day of the week (Sunday through Saturday).
- If Monthly is selected: choose the day of the month (1-31).
- Click Save to activate the schedule.
The next execution time will be displayed below the schedule configuration. This updates automatically when you change the schedule settings.
Available APIs in Cron Scripts
Cron scripts receive a special version of the tracker_api called PeriodicScriptTrackerApi. This version provides limited access compared to the full tracker API available in conversation scripts:
- LLM Methods: You have access to all LLM-related methods (e.g.,
llm_call(),llm_call_with_tools(), etc.). All LLM calls will use the default provider configured in your bot settings. - Configuration Access:
tracker_api.get_config_value(key): Access configuration values stored in your bot's config.tracker_api.get_config_map(): Retrieve all configuration values as a dictionary.
- Logging: Use
logger.info(),logger.warning(),logger.error()to log messages that will be captured in the execution history.
You can also use standard Python features like print() statements. All output will be captured and displayed in the execution logs.
Note: The
PeriodicScriptTrackerApidoes not have access to conversation-specific features like conversation history, user messages, or conversation state. It is designed specifically for background tasks.
Example:
from shared import PeriodicScriptTrackerApi
from shared import CronScript
from loguru import logger

import httpx
from datetime import datetime

class cron_script(CronScript):
    async def run(self, tracker_api: PeriodicScriptTrackerApi):
        logger.info("Starting daily website scraper")

        # Access configuration for the target URL
        target_url = tracker_api.get_config_value("scraping_url")

        try:
            # Fetch data from external source
            async with httpx.AsyncClient() as client:
                response = await client.get(target_url)
                content = response.text

            logger.info(f"Fetched {len(content)} characters from {target_url}")

            # Process and clean the content using LLM
            cleaned_content = await tracker_api.llm_call(
                f"Extract the main content from this HTML and format it as clean text:\n\n{content[:5000]}"
            )

            logger.info(f"Processed content: {len(cleaned_content)} characters")

        except Exception as e:
            logger.error(f"Error during scraping: {str(e)}")
            raise
Manual Execution
You can manually trigger a cron script at any time, regardless of its schedule:
- Open the script in the editor.
- Click the manual execution icon (▶) (second icon) in the toolbar.
- The script will execute immediately with higher priority than scheduled executions.
Manual execution is useful for:
- Testing your script before scheduling it.
- Running the script on-demand outside of its regular schedule.
- Debugging and troubleshooting.
Monitoring Execution
To view the execution history of your cron scripts:
- Click on your cron script in the file tree.
- Click the execution history icon (first icon) in the toolbar.
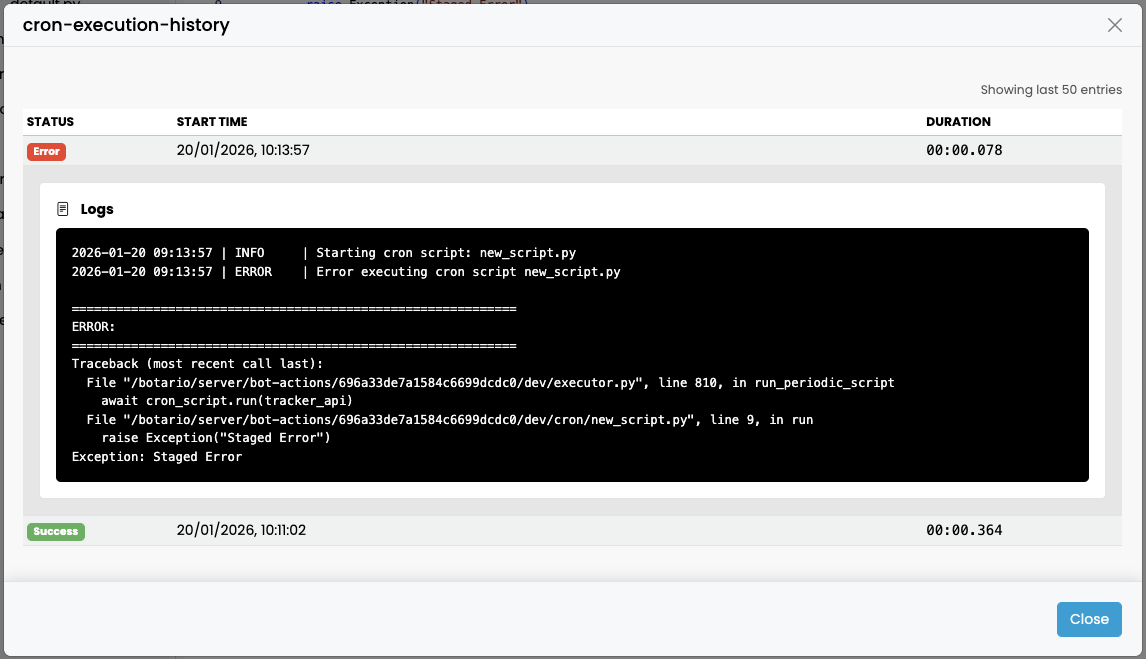
- The Execution History modal will open, showing the last 50 executions.
Execution History Table
The execution history displays all recent script runs in a table format with the following information:
- Status:
- Success (green badge): The script executed successfully without errors.
- Error (red badge): The script encountered an error during execution.
- Pending: The script is scheduled but has not yet started.
- Running: The script is currently executing.
- Start Time: When the execution began (displayed in your local timezone, format:
DD/MM/YYYY, HH:MM:SS). - Duration: How long the execution took (format:
HH:MM:SS.milliseconds).